Hi, I'm Christoph, the developer of compress-or-die.com.
I hereby ask you to accept the cookies
of the self-hosted Matomo Tracking software which I use to analyze the traffic to this website.
You can revoke your consent at any time on the following page: Privacy policy.
There are a lot of articles about online image compression tools in the net, most of them are very superficial.
Usually they end with a simple: "It generates smaller pictures, so it's got to be better."
Unfortunately, such statements are made regardless of which settings have been made and without considering the consequences for the respective target group (photographer, web developer, ad developer etc.) or the respective application purpose (archiving, website presentation, printing etc.).
Basically, THE tool does not exist. There is only the optimal tool for a certain purpose.
So I will compare the features of each tool and see where they have their strengths and weaknesses.
And of course I will test the actual JPEG compression capabilities and how the tools compare to Compress-Or-Die.
How do you assess the results of the tools?
How do you compare the quality of two images?
At which quality level do they look good enough?
And as of when do compression artifacts interfere?
Depending on the intended purpose and person, the answers will vary considerably.
Some clever minds have thought about it and developed the SSIM algorithm to simulate the perception of our eyes.
It tries to generate an absolute value that represents the perceived difference between two images.
I will use this algorithm to compare the results of the tools by comparing the produced JPEG with the original image.
For better readability and comprehensibility, I multiply the resulting value by 1000 and subtract it from 1000 so that I effectively get a value for the visual distance of two images.
Based on my very individual perception, I created the following evaluation table for the JPEG format:
The tools seem to work a little magic and give you back a JPEG, which looks identical to the original with a much smaller file size.
How do the compression tools manage this?
Normally, your images will be compressed again, because measures that do not change the image data (e. g. removal of meta data, baseline to progressive reconstruction, optimization of the Huffman tables) will normally not get much out of an image.
Two things are decisive for the new compression: Firstly, the JPEG encoder used for adjustable features such as chroma subsampling, and secondly, the selected quality level.
The available JPEG encoders are now quite exhausted.
I assume that most of the tools, like me, have chosen MozJPEG, which is currently the most mature of them all.
Mozilla Research's mozJPEG is currently managed by Kornel, who has already made an excellent name for himself in the field of PNG compression with pngquant.
Much more interesting, however, is the quality level (actually adjusting the values for the quantization tables, see Finally understanding JPG).
Since in each tool the quantization tables are set using different scaled quality controls (e. g. Adobe Photoshop: 1-12), here is a hint that I will use the system which is most common and also used by mozJPEG: The quality scale from 1-100.
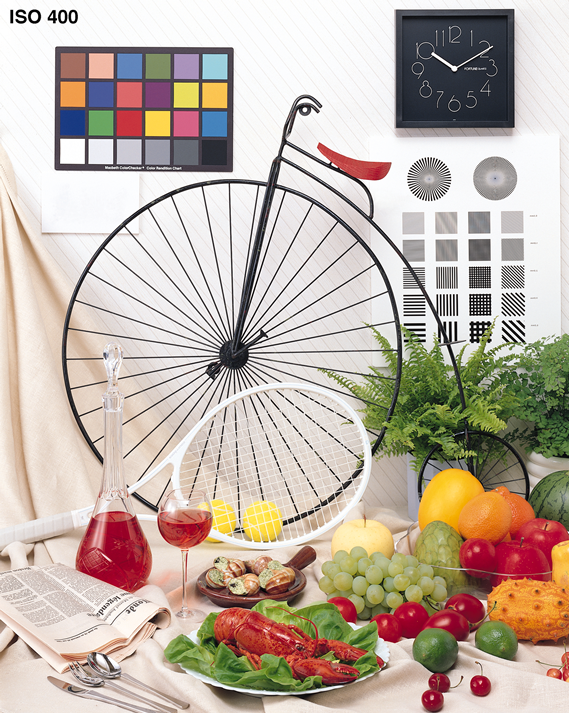
In order to understand how the tools determine the quality factor necessary for recompression, we should first look at the following two diagrams, which I have generated from the sample image.
The first is the typical progression from file size to set quality level of a JPEG:
From these two images you can see very well that the file size increases exponentially from the JPEG quality value of approx. 75, while the perceived quality only improves very little.
The value of about 75 is therefore the sweet spot and has the best quality-/file size ratio.
In my experience, however, the value from which most users can no longer see any difference between the original and the newly created image is, according to my experience, higher than about 85, depending on the image.
So the tools choose a value above 85, which in their opinion is just enough for the user to find no difference to the original image.
However, as the file size in the area grows exponentially, it makes an enormous difference in file size whether a tool chooses a value of 87 or 88.
The fact that the file size saving with the tools is now so enormous is in most cases due to the fact that images from digital cameras or smartphones have set an extremely high JPEG quality value ex works.
And as we have seen in the graphic, the file size increases to the extreme with very high quality levels such as 90 and more.
However, this high camera setting is justified: A photographer is grateful for every ounce of quality that prevents image errors after processing.
However, such a high quality level is usually nonsense for the main street.
I just threw it in for a second: Does it not make sense to accept barely visible artifacts and save 30% in file size?
Unfortunately, the result cannot be sold to the user as well as the statement "We reduce your pictures without any loss of quality".
Since the developers of the tools have to stand by this statement, the results of many optimization tools are greater than they should be.
Let's now move on to the individual introduction, in which I will introduce what I have noticed about the tools. Since I'm the developer of Compress-Or-Die, I will of course compare them with it.
tinyJPG is the smaller brother of the relatively well known PNG compression tool tinyPNG.
Confirmed by its success, the Dutch company voormedia finally published this counterpart in November 2014.
A positive feature is the large number of versions available to the user.
There is a web interface, a Photoshop plugin (50$), a Wordpress plugin, a Magento plugin and an API, which is used in the background by the plugins, but can also be used by yourself.
As long as you do not want to convert more than 500 images per month, this is free of charge.
The upload limit of max. 5 MB per image is not particularly high, but it also shows clearly that tinyJPG would like to appeal to web developers and hobby photographers rather than professional photographers.
It is possible to upload up to 20 JPEG images at once via an encrypted connection, which is probably the reason why there is no preview function.
However, since there are no setting options and tinyJPG promises that there are no visible changes in the image, this decision is understandable.
Meta data such as Exif, IPTC and XMP are removed, which should be okay for almost all users of the target group as long as they are not working in an image agency or are professional photographers.
tinyJPG retains the chroma subsampling of the input JPEG.
Personally, I consider this to be an unfortunate solution in terms of the target group, as most users will not be able to set this setting for their original image.
And since a 4:2:0-subsampling should be enough in almost all cases, a lot of saving potential of about 20% is wasted in case of a 4:4:4 input image.
A positive feature is the color space conversion to sRGB, which otherwise only offers Compress-Or-Die.
And the auto-rotation based on the Exif data embedded in the JPEG, which is still offered by Compress-Or-Die and Optimizilla.
tinyJPG chooses a relatively high quality level, which I was able to beat with Compress-Or-Die with slightly smaller filesize and better quality:
The tool of Stephane Lyver stands out for its simplicity rather than its features, which also appeals to a certain target group.
Only one JPEG image can be uploaded at a time via an encrypted connection, but the upload limit of 10 MB leaves a lot of space and you will be rewarded with a preview.
Meta data such as Exif, IPTC and XMP are also removed here. The chroma subsampling is always set to 4:2:0.
Due to the moderate quality level chosen by compressor.io, which is at the edge of visible artifacts, we are dealing here with a tool for webworkers who do not insist on imaginary quality advantages.
I personally find the specified value for compression better than with the other tools. Unfortunately, it contains only a few features.
I was able to beat the results with Compress-Or-Die with slightly smaller file size and better quality:
compressor.io also supports an option for lossless compression. For JPEGs that were compressed with Compress-Or-Die before, no improvement could be achieved.
I suspect that this setting removes meta-data, optimizes huffman tables and rebuilds the structure from baseline to progressive, which is usually the default lossless optimization procedure and of course is done by Compress-Or-Die.
Optimizilla was a little surprise in the test.
Actually, I wanted to test compressjpeg.com until I noticed that both tools come from Mediafox Marketing s. r. o. in the Czech Republic.
Just like compresspng.com and gifcompressor.com. Unfortunately, all pages seemed a little bit overloaded with advertising, so the first impression was a bit marred.
As with tinyJPG, up to 20 JPEG images can be uploaded at the same time. I didn't find anything about an upload limit and the connection is unencrypted.
In spite of the mass upload function you will be rewarded with a preview.
Meta data such as Exif, IPTC and XMP are also removed here. The chroma subsampling is always set to 4:2:0.
Optimizilla chooses an extremely high quality level, which I was able to beat with Compress-Or-Die with slightly smaller filesize and better quality:
JPEGmini from the Israeli manufacturer Beamr Imaging Ltd. has, like tinyJPG, a large number of available versions.
In addition to the obligatory web interface, there is an Adobe Photoshop plug-in, an Adobe Lightroom plug-in, desktop software (Windows, Mac, $29) and an installable server version.
However, I did not find a price for the server version, and registration is required for the trial version. That's why I assume that this is a little more expensive.
Exceptional: You can upload an image with up to 128 megapixels, which actually means that just about every JPEG image can be uploaded.
Unfortunately, only via an unencrypted connection.
The chroma subsampling of the original image is retained, as well as the meta data.
In addition, JPEGmini has a very high quality level, which I was able to beat with Compress-Or-Die with slightly smaller filesize and better quality:
Due to the fact that JPEGmini retains the meta data and chroma subsampling, the possible file size when uploading and the presence of the Lightroom plugin, I assume that JPEGmini clearly addresses photographers.
kraken.io from the Nekkra UG in Germany seems at first glance to be the counterpart of JPEGmini.
The upload limit is only one MB, which eliminates the need for a photo upload and we have the unofficial proof that this tool is for webworkers.
Features such as mass upload, setting of the chroma subsampling and the possibility to keep or remove meta data are welcome.
In addition, the quality level can be adjusted manually.
Here you should not make the mistake to leave the controller on "Lossy" and let the optimizer do the work.
In this case, the selected quality level is absurdly high and results in the largest file size in this test.
But since you can adjust the quality level, we want to turn a blind eye. However, in this case it would have been nice to have a preview function.
The file size is by far the largest in the test. This was also beaten with Compress-Or-Die at slightly smaller file size and better quality:
Compress-Or-Die. com tries to eliminate all the problems of other tools.
It was created as a by-product of a federal funded research project in the field of digital advertising media compression.
The upload limit is 16 MB and should therefore also be sufficient for high-resolution photos. The connection is also secured via SSL/TLS.
However, there is no mass upload, which is because Compress-Or-Die works slightly different from the other tools.
It doesn't attempt to achieve a result as quickly as possible and without work, but rather offers a variety of adjustment options that allow you to get the most out of each image.
The result of each change can be checked at any time by the image preview.
In contrast to other tools Compress-Or-Die also allows the upload of lossless formats such as PNG.
This allows you to upload the original data of the image, resulting in better quality.
The chroma subsampling can be freely selected, there are separate quality controls for luminance and chroma channels, the color space is automatically converted to sRGB, and images are automatically rotated according to the embedded EXIF data.
In addition, there are unique features such as the "Selective Quality", which allows you to compress user-defined image regions with a different quality level.
Or the possibility to create transparent JPEGs as long as the image is viewed later in a browser.
Compress-Or-Die is aimed at all users who want to display their images digitally.
Not surprisingly, tools that have returned a larger file size can also be of better quality on paper.
Since the manually adjusted results of Compress-Or-Die. com are only slightly better than those of the other tools, you can see that it is not so much the encoder used that matters, but the quality level used.
Who is the qualitative winner from the comparison now?
This can only be the tool that allows you to set the quality factor yourself, thus Compress-Or-Die.
Because which quality level is the right one for you depends on your own subjective perception, your own tolerance limit and the intended application of the image.
In addition, Compress-Or-Die allows a wide range of settings that are absolutely necessary to have the chance to create the best possible JPEG.
For example, if a tool does not allow you to create a grayscale image, the encoder may still be good, but the resulting image will always be larger than the grayscale JPEG at the same quality.
On the other hand, if you want to reduce a large number of images to a file size that is not necessarily optimal, the use of JPEGmini is not wrong.
In the printing area it is often not important whether you save a few kB. Here it's about an enormous amount of image data that can be uploaded without any problems thanks to the exceptional upload limit.
The mass upload and the Lightroom plugin are also very helpful.
All users who work for the display on the screen and don't want to deal with each picture individually, can try tinyJPG because it is the first tool with a mass upload function among the small file sizes.
It also provides an API to integrate image reduction into an automated workflow.
If you still have questions, suggestions or wishes, drop me a line.
If you always wanted to know how the JPEG compression works under the hood I want to recommend this article to you. It was important to me to write an article that is reasonable for every level of understanding.
Furthermore it contains 7 valuable tricks to reduce the file size of your JPEGs by exploiting the technical functionality of the JPEG compression algorithm.
Ever wondered why some of your PNGs are of large file size while similar PNGs are so small?
Since this question comes up so often, I have written a follow-up to my article "Understanding JPEG" to explain the bare necessities of the PNG compression algorithm in layman's terms.
At the end you will also get 7 tips on how to get your PNGs to a REALLY small file size.
You don't like ads? Support Compress-Or-Die and become a patron who does not see ads. Your upload limit gets doubled too!
News
COD says Goodbye
2026-06-24
After 10 years of compress-or-die.com, it’s time for me to say goodbye. It’s been a great time—I’ve learned a lot technically, but I’ve also met some wonderful people.
compress-or-die.com was created back then to get the most out of graphics for small banners. At the time, I was still working at an advertising agency. And over time, it just kept growing and growing.
But some of you may have noticed that over the past two years, there have been hardly any changes, and there hasn’t been much from me to read—which was quite different back in the day.
But a lot has changed in my personal life: children, new and different hobbies, and health issues have shifted my focus in other directions. And so, I had less and less time and motivation left for this project that was once so close to my heart.
For this reason, this chapter is now coming to an end. I’d like to thank all of you for using COD and for providing such great feedback, which helped COD grow so much.
I’d especially like to thank the Patrons who have covered the server costs over the past few years. Thank you so much!
On July 25, 2026, I will send COD into its well-deserved retirement.
All the best to you all,
Christoph
Check out our Reddit channel if you want to comment on the news.